
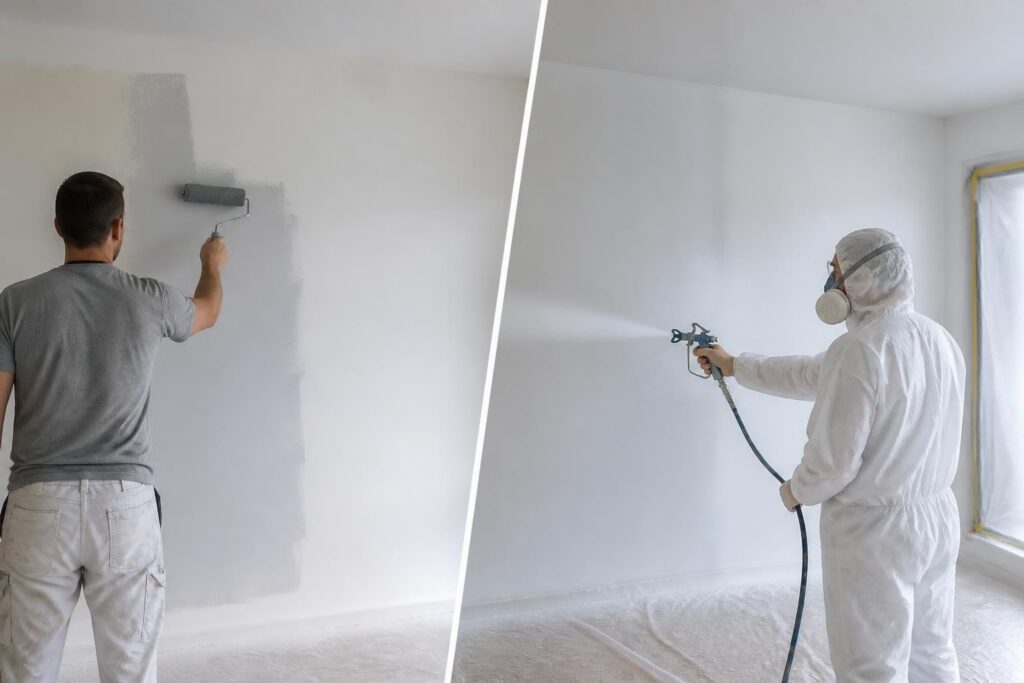
Transforming interior spaces with a fresh coat of paint has never been faster or more efficient than with spray application techniques. Whether you're renovating a family home in Constantia, updating a rental property in Claremont, or refreshing commercial spaces across Cape Town, the decision to spray paint interior walls offers significant advantages over traditional brush and roller methods. Understanding the proper techniques, equipment, and preparation steps ensures professional results that last for years while minimizing disruption to your property.
Understanding the Benefits of Spray Painting Interior Walls
Modern spray painting technology has revolutionized how professional contractors and property owners approach interior painting projects. The efficiency gains are remarkable, with spray application covering large wall surfaces up to ten times faster than conventional rolling methods.
Speed and Efficiency Advantages
When you spray paint interior walls, you're leveraging advanced atomization technology that creates an even, consistent finish in a fraction of the time required for traditional methods. A typical 4-meter by 3-meter bedroom wall that might take 45 minutes to roll can be sprayed in approximately 5-10 minutes once proper preparation is complete.
The time savings compound across larger projects:
- Residential homes: Complete interior repaints in 2-3 days instead of a week
- Apartment complexes: Turnover units faster between tenants
- Commercial spaces: Minimize business disruption with weekend-only work
- Heritage properties: Apply delicate finishes to ornate moldings and detail work
Superior Finish Quality
Beyond speed, spray application delivers a smoother, more uniform finish that's difficult to achieve with brushes or rollers. The atomized paint particles create a seamless surface without roller marks, brush strokes, or lap lines that can appear under certain lighting conditions.
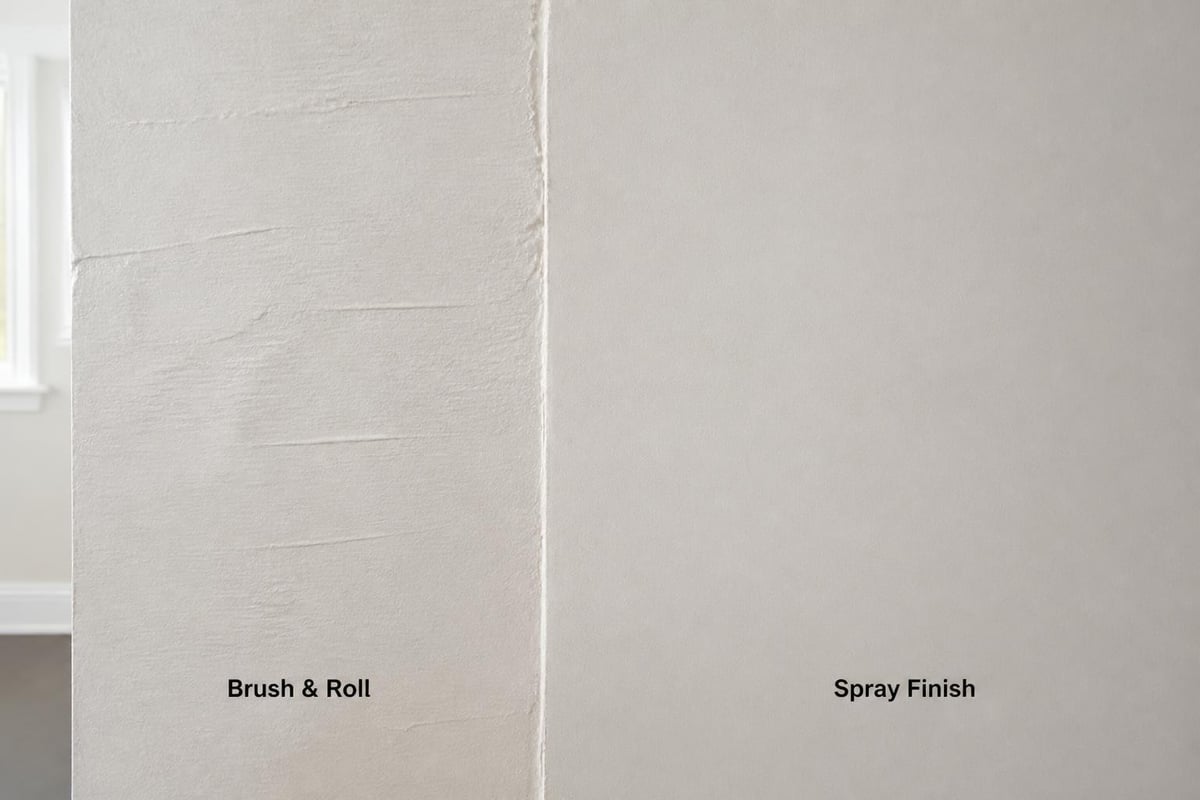
This professional-grade finish proves particularly valuable in Cape Town's abundant natural light, where imperfections become more visible. Homes with large windows facing Table Mountain or ocean views benefit from flawless wall surfaces that don't distract from the spectacular scenery.
Essential Equipment for Interior Spray Painting
Selecting the right equipment determines the quality of your finished walls and the efficiency of your project. Professional-grade tools deliver superior results compared to consumer-level equipment, though the investment varies significantly.
Airless Spray Systems
Airless sprayers represent the industry standard for interior wall painting. These systems pump paint at high pressure (typically 1,500-3,000 PSI) through a small tip, atomizing the material without requiring compressed air.
| Equipment Type | Price Range (ZAR) | Best For | Coverage Rate |
|---|---|---|---|
| Entry Airless | R4,500 – R8,500 | Single rooms, DIY | 10-15 m²/hour |
| Mid-Range Airless | R8,500 – R18,000 | Whole homes | 20-30 m²/hour |
| Professional Airless | R18,000 – R45,000 | Commercial projects | 35-50 m²/hour |
| HVLP Systems | R2,500 – R12,000 | Detail work, cabinets | 5-12 m²/hour |
Professional contractors typically invest in mid to high-range equipment that withstands daily use and delivers consistent results. For property owners considering a single project, rental options throughout Cape Town typically cost R650-R1,200 per day depending on equipment quality.
Spray Tips and Nozzle Selection
The spray tip determines paint pattern, flow rate, and finish quality. Tips are coded with three digits: the first indicates the fan width in inches when sprayed 30cm from the surface, and the last two indicate the orifice size in thousandths of an inch.
Common tip selections for interior walls:
- 411 or 413: Thin materials, light coatings, final finish coats
- 515 or 517: Standard latex paints, most interior applications
- 521 or 523: Heavier primers, textured paints
Switching between tips allows precise control over coverage and finish characteristics as you spray paint interior walls with different products or in various conditions.
Comprehensive Wall Preparation Process
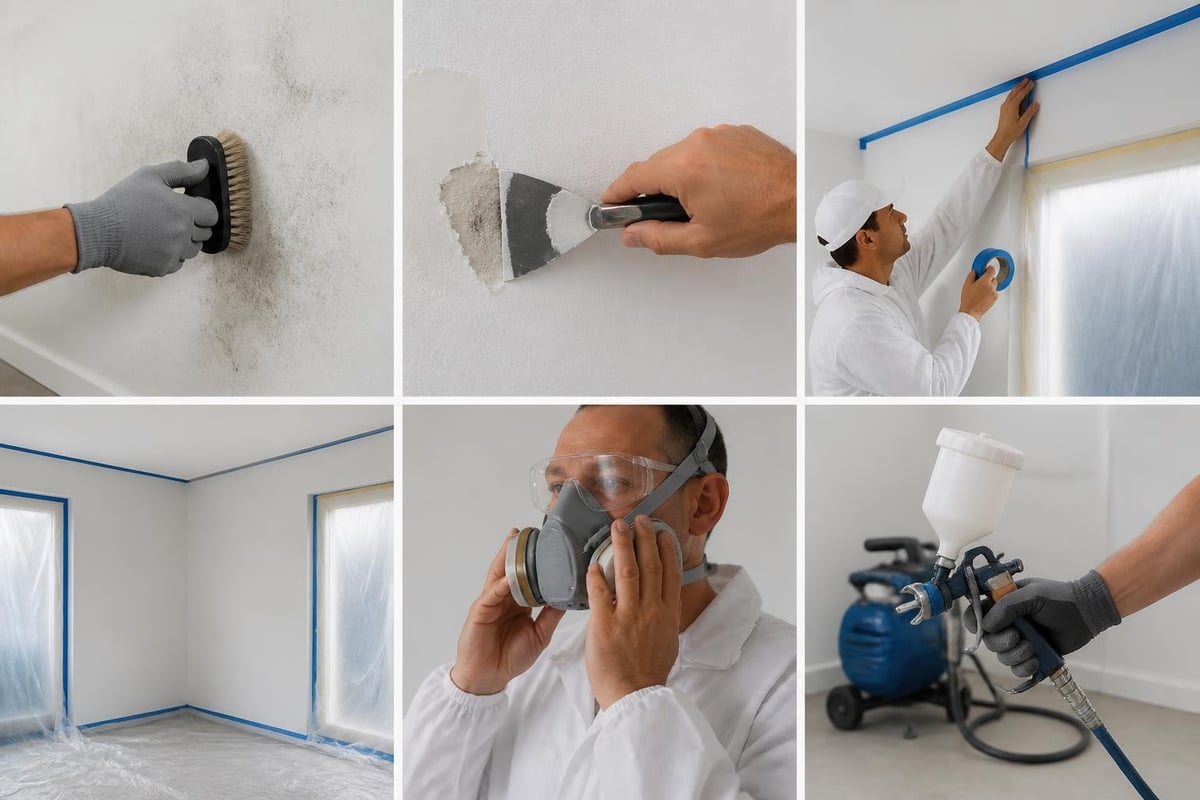
Professional results depend primarily on thorough preparation rather than expensive equipment. The preparation phase typically consumes 60-70% of total project time but determines the longevity and appearance of the finished surface.
Surface Cleaning and Repair
Interior walls accumulate dust, grease, and contaminants that prevent proper paint adhesion. Start by removing all wall fixtures, switch plates, and decorative elements. Vacuum walls from ceiling to baseboard using a soft brush attachment to remove loose dust and cobwebs.
Follow with a cleaning solution appropriate to your wall condition. For typical residential surfaces, a mixture of warm water and mild detergent works effectively. Properties near the Cape Town coastline may require stronger solutions to remove salt residue that penetrates through windows and ventilation systems.
Proper wall preparation techniques ensure the surface accepts paint uniformly. Pay special attention to these common issues:
- Patch all holes and cracks with appropriate filler (plaster for large areas, spackle for nail holes)
- Sand repaired areas smooth using 120-grit sandpaper
- Wipe down surfaces with a damp cloth to remove sanding dust
- Prime stained or repaired areas to prevent bleed-through
- Allow adequate drying time between preparation steps (especially important during Cape Town's humid winter months)
Masking and Protection
When you spray paint interior walls, overspray protection becomes critical. Paint particles travel beyond the immediate spray pattern and settle on unprotected surfaces throughout the room.
Essential masking materials:
- Plastic sheeting (2-3 mil thickness) for floors and large furniture
- Masking tape (quality painter's tape, not general-purpose tape) for crisp edges
- Masking film with integrated tape for windows and doorways
- Corner guards for protecting baseboards and ceiling lines
- Ram board or canvas drop cloths for high-traffic areas during multi-day projects
Professional teams at companies specializing in spray painting typically allocate 45-60 minutes per average room for proper masking. This investment prevents costly cleanup and protects your property's finishes, fixtures, and flooring.
Selecting the Right Paint Products
Paint quality directly impacts both application ease and long-term performance. Cape Town's unique climate, with coastal humidity and intense UV exposure through windows, requires specific product characteristics.
Interior Paint Formulations for Spray Application
Not all interior paints spray equally well. Products designed for spray application feature specific viscosity ranges and additive packages that atomize properly without excessive thinning.
Key product specifications:
- Solids content: 35-45% for premium products (higher solids mean better coverage)
- VOC levels: Choose products under 50 g/L for healthier indoor air quality
- Viscosity: 85-95 KU (Krebs Units) for optimal spray characteristics
- Dry time: Consider products with 2-4 hour recoat windows for efficient multi-coat application
Low-VOC and zero-VOC formulations have improved dramatically in recent years. Certified low-emission interior paints meet stringent air quality standards while delivering professional results. These products prove especially important for bedrooms, nurseries, and properties housing sensitive individuals.
Sheen Selection and Coverage Considerations
Sheen level affects both appearance and practical performance when you spray paint interior walls:
| Sheen Level | Light Reflection | Durability | Best Applications | Coverage (m²/L) |
|---|---|---|---|---|
| Flat/Matte | 0-5% | Low | Adult bedrooms, ceilings | 12-14 |
| Eggshell | 10-25% | Moderate | Living rooms, dining rooms | 11-13 |
| Satin | 25-35% | Good | Hallways, family rooms | 10-12 |
| Semi-Gloss | 35-70% | Excellent | Bathrooms, kitchens, trim | 9-11 |
Higher sheen levels highlight surface imperfections but clean more easily, making them ideal for high-traffic areas and spaces prone to moisture. Flatter sheens hide wall irregularities but show marks and scuffs more readily.
Professional Spray Painting Techniques
Mastering proper technique separates acceptable results from truly professional finishes. Consistent motion, appropriate distance, and correct overlap create the uniform appearance that makes spray-applied walls superior to rolled surfaces.
Establishing the Correct Spray Pattern
Before touching paint to your walls, test your equipment on cardboard or scrap material. Adjust pressure settings and verify your tip produces an even, oval pattern without heavy edges or center voids.
Optimal spray settings for interior walls:
- Pressure: 1,200-1,800 PSI for most latex paints (adjust until you achieve atomization without excessive overspray)
- Distance: 25-30 cm from wall surface (closer causes runs, farther creates dry spray and texture)
- Speed: Move at approximately 1 meter per second (consistent speed prevents uneven coating)
- Overlap: 50% overlap between passes (ensures uniform mil thickness)
Begin each pass before reaching the wall edge and continue past the opposite edge. This technique, called "triggering off," prevents heavy buildup at the beginning and end of each stroke.
Managing Multiple Coat Application
Most interior wall projects require two coats minimum when you spray paint interior walls, even with premium products. The first coat seals the surface and provides a uniform base; the second coat develops full colour depth and coverage.
Allow adequate drying time between coats. Follow manufacturer specifications, typically 2-4 hours for recoating in Cape Town's moderate climate. Higher humidity during winter months may extend drying times to 4-6 hours.
Apply each coat at 90-degree angles to the previous coat. If your first coat features horizontal passes, apply the second with vertical strokes. This cross-coating technique catches any thin spots and creates superior uniformity.
Safety Protocols and Ventilation Requirements
Spray painting generates airborne particles and chemical vapours that require proper management to protect both applicators and building occupants. Professional safety practices prevent health issues and ensure compliance with occupational standards.
Respiratory Protection and Personal Equipment
Organic vapour respirators rated for paint application represent the minimum acceptable protection. Half-face respirators with P100 filters and organic vapour cartridges protect against both particulates and chemical vapours.
Complete safety equipment checklist:
- Respirator: NIOSH-approved for organic vapours and particulates
- Eye protection: Safety glasses or full-face respirator
- Protective clothing: Disposable coveralls prevent paint contact with skin
- Gloves: Nitrile gloves resist paint solvents
- Head covering: Disposable caps prevent paint in hair
Replace respirator cartridges according to manufacturer recommendations or when you detect paint odors through the mask. Cartridge life varies with usage intensity but typically ranges from 8-40 hours of active spraying.
Ventilation and Air Quality Management
Proper indoor air quality management during painting projects protects both immediate health and long-term air quality. Create cross-ventilation by opening windows on opposite sides of the work area and positioning fans to exhaust contaminated air outdoors.
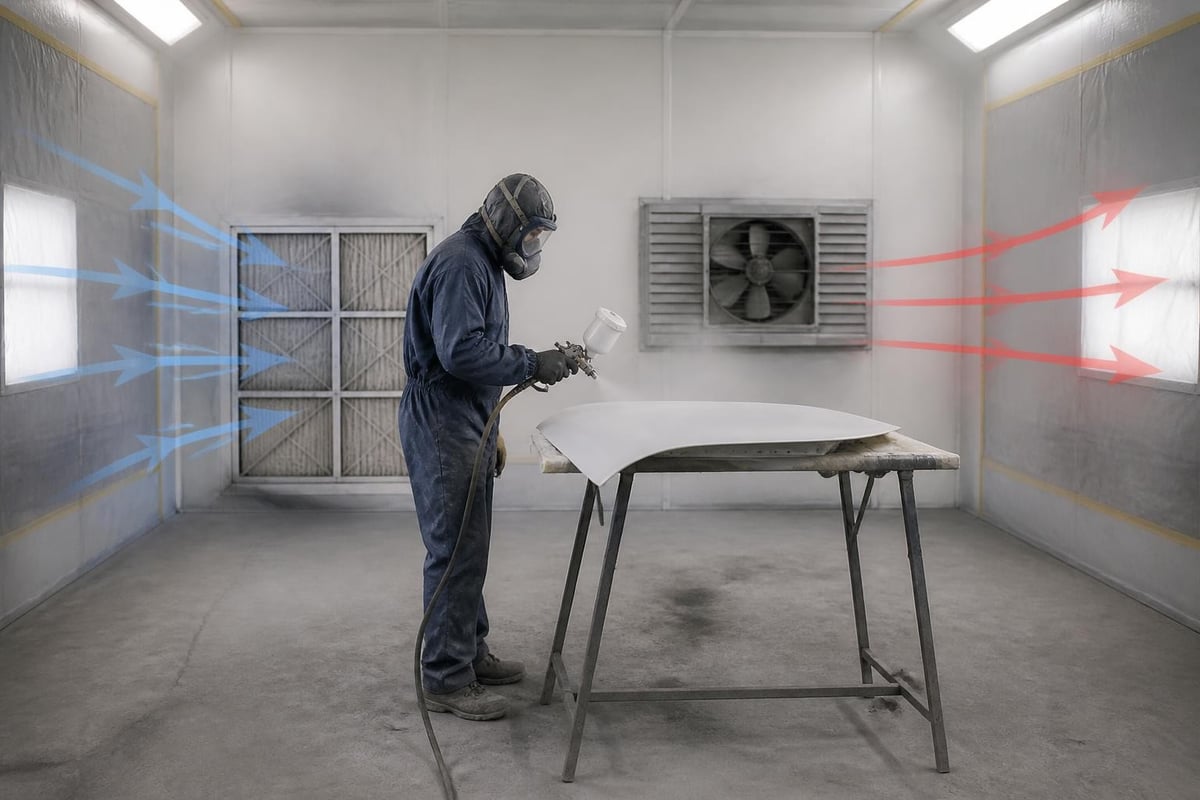
Maintain ventilation for 48-72 hours after completing spray work. Paint continues off-gassing volatile compounds during the curing process, even when the surface feels dry to touch. Enhanced ventilation proves especially important in properties with young children, elderly residents, or individuals with respiratory sensitivities.
Cost Considerations and Project Planning
Understanding the complete cost picture helps property owners make informed decisions about whether to spray paint interior walls versus using traditional methods or hiring professional contractors.
Material and Equipment Costs
A typical three-bedroom home in Cape Town (approximately 180 square meters of wall surface) requires these materials:
Budget breakdown for DIY spray painting:
- Paint (40-50 litres premium latex): R4,000 – R6,500
- Primer (20-25 litres if needed): R1,500 – R2,200
- Equipment rental (3 days): R1,950 – R3,600
- Masking materials: R800 – R1,200
- Safety equipment: R650 – R1,100
- Spray tips and supplies: R450 – R750
Total DIY cost estimate: R9,350 – R15,350
Professional contractors typically charge R35-R65 per square meter for spray-applied interior painting, including all materials, labour, and cleanup. The same three-bedroom home would cost approximately R6,300 – R11,700 in professional fees, plus materials.
Time Investment and Learning Curve
First-time spray painters should expect a significant learning curve. Tasks that professionals complete in minutes may require hours initially. Common challenges include:
- Technique consistency: Maintaining even speed and distance requires practice
- Overspray management: Learning to control overspray in corners and edges
- Equipment troubleshooting: Identifying and correcting spray pattern problems
- Surface preparation: Properly masking and protecting adjacent surfaces
Property owners tackling their first spray painting project should budget 3-5 days for a whole-home interior, including preparation, application, and cleanup. Experienced DIYers can reduce this to 2-3 days, while professional teams complete similar projects in 1-2 days.
Common Problems and Solutions
Even experienced painters encounter challenges when they spray paint interior walls. Recognizing and correcting issues quickly prevents material waste and maintains finish quality.
Drips, Runs, and Sags
Heavy application causes paint to flow downward before drying, creating visible defects. Prevent runs by:
- Reducing pressure if paint appears too wet on the wall
- Increasing speed of your spray passes
- Maintaining consistent distance from the surface
- Applying lighter coats and building coverage gradually
If runs occur, allow them to dry completely (minimum 24 hours), then sand smooth with 220-grit paper and recoat the affected area.
Orange Peel Texture
A bumpy, textured appearance resembling citrus skin indicates improper atomization. This common defect results from paint drying before particles level on the surface.
Correction strategies:
- Increase pressure to improve atomization
- Move closer to the wall surface (within the 25-30 cm range)
- Thin paint slightly if within manufacturer guidelines (never exceed 10% thinning)
- Raise room temperature if working in cold conditions (below 15°C)
Holidays and Thin Spots
Missing areas or insufficient coverage become visible when light hits walls at specific angles. Prevent holidays by maintaining 50% overlap between passes and applying cross-coats. Mark any thin areas with small pencil marks during application, then correct them before the coat fully dries.
Environmental and Regulatory Considerations
Paint products and application methods face increasing environmental scrutiny. Understanding current regulations and selecting compliant products protects both health and environment.
VOC Regulations and Product Selection
Volatile organic compounds contribute to indoor air pollution and outdoor smog formation. Current aerosol coating regulations establish maximum VOC content for various product categories. While South African regulations differ from international standards, selecting low-VOC products benefits indoor air quality regardless of legal requirements.
Green Seal certified products meet stringent environmental and health standards. These paints typically contain less than 50 g/L VOC for flat finishes and under 100 g/L for non-flat formulations, significantly lower than conventional products that may contain 200-380 g/L.
Waste Management and Cleanup
Proper disposal of paint waste, used masking materials, and cleaning solvents protects Cape Town's water resources and natural environment. Never pour paint or cleaning solutions down household drains.
Responsible disposal methods:
- Allow unused paint to dry completely before disposal in household waste
- Take larger quantities to municipal hazardous waste facilities
- Clean spray equipment outdoors to prevent indoor spills
- Filter and reuse cleaning solvents when possible
- Recycle empty paint containers where facilities exist
Many Cape Town municipalities offer hazardous waste collection days for residents. Check with local authorities for scheduled collection events in your area.
Advanced Techniques for Specialty Situations
Certain architectural features and design requirements demand modified approaches when you spray paint interior walls.
Textured and Specialty Surfaces
Heavily textured walls require adjusted technique to ensure complete coverage in surface irregularities:
- Use larger spray tips (519 or 521) to increase material flow
- Apply paint at slightly higher pressure for better penetration
- Hold the gun closer to the surface (20-25 cm instead of 25-30 cm)
- Reduce speed slightly to allow more material deposition
- Consider backrolling immediately after spraying for maximum penetration
Heritage and Period Properties
Cape Town's abundant Victorian and Edwardian properties present unique challenges. Original plaster walls may be more porous than modern drywall, requiring additional primer coats. Ornate moldings and ceiling roses benefit from spray application but demand careful masking.
Technical application guidelines provide manufacturer-specific recommendations for specialty situations including historic plaster, moisture-prone areas, and premium finish requirements.
Quality Control and Final Inspection
Professional results require systematic quality control throughout the application process and comprehensive final inspection.
During-Application Checks
Monitor your work continuously as you spray paint interior walls:
- Pause periodically to view walls from different angles and lighting conditions
- Check for holidays by running a light parallel to the surface
- Verify consistent sheen across the entire wall area
- Test dry time by lightly touching inconspicuous areas before applying subsequent coats
Catching problems during application allows immediate correction before paint fully cures.
Post-Completion Assessment
Once final coats dry completely (typically 24 hours for light use, 7-14 days for full cure), conduct thorough inspection:
Final quality checklist:
- Uniform colour and sheen across all surfaces
- Clean, crisp lines at ceiling, baseboard, and trim intersections
- No visible drips, runs, or sags
- Complete coverage without holidays or thin spots
- Smooth finish without orange peel or texture variations
- Properly cleaned and reinstalled fixtures and hardware
Touch up any identified defects using the same spray equipment and technique used for initial application. Small areas can be corrected with brush and roller, but blending spray-applied touch-ups creates invisible repairs.
Spray painting interior walls offers significant advantages in speed, finish quality, and professional results when executed with proper technique and equipment. From careful surface preparation through final inspection, each step contributes to long-lasting, beautiful walls that transform your space. Whether you're refreshing a single room or renovating an entire property, understanding these principles helps you achieve superior outcomes. For Cape Town property owners seeking professional results without the learning curve, Qualispray delivers expert spray painting services backed by years of experience across residential and commercial properties throughout the Western Cape.
Get Interior Walls Spray Painted Properly
Qualispray runs airless spray teams for homes, complexes and commercial interiors across Cape Town. Read more about our spray painting service or book a free quote. Call 021 981 9120.